LESSON 1
Helmet & Bike Fit, What To Wear
Goals
- To appropriately fit helmets to ensure cyclist safety (Helmets are required by ALL riders when on bicycle)
- To properly fit bicycle seat height and brake levers to meet the needs of individual cyclists
- To understand how bright clothing impacts the way motorists see you while riding
Overview
Volunteers will assist students with adjusting helmets and bicycles to ensure proper fit. During this time, volunteers are encouraged to stress the importance of always wearing a helmet and how properly sized equipment increases cyclist safety and makes riding more enjoyable.
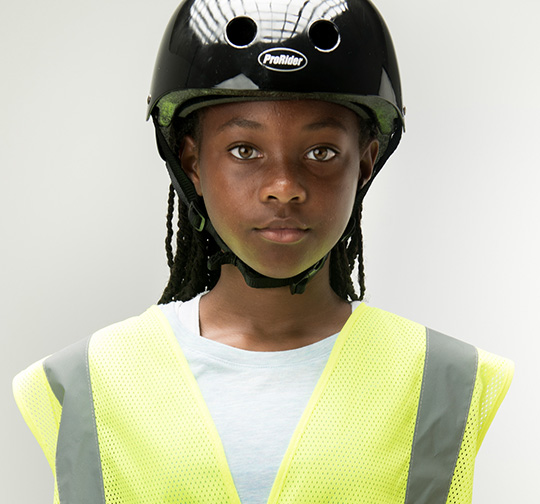
Students will also receive a safety vest and be instructed to wear it, along with their helmet, during each Bike Club session.
Students will make a name tag for their helmet and utilize the tracking code on each bicycle to identify their equipment each week. This ensures that the equipment adjusted to their needs can be used every week.
*NOTE: Regarding ‘Club Rules’ – Each club is encouraged to establish its own rules (i.e. follow directions, respect one another, always wear a helmet, etc.)
Volunteer Connector
Ask students if they typically wear a helmet when riding a bicycle and, if no, why not?
- Don’t have one
- Uncomfortable
- Uncool
Let your students know that head injuries are the most serious type of injury and the most common cause of serious injury for bicyclists.
A properly fit helmet, like the one that Bike Club provides for them, can be very comfortable and even stylish!
When on bikes, helmets MUST be worn by students and instructors.
Helmets that have been “crashed” should be replaced.
Preparation
- Call the students together in a group and discuss and establish club rules*
- Divide students into 3 groups (helmet fit, bike fit, vest/clothing) with at least one volunteer to help support fitting
- Make sure that each volunteer has name tags and a marker to label helmets and the tools needed to adjust seat height and brake levers
Equipment
- Helmets
- Bicycles
- Safety Vests
- Name Tags (or Tape) & Markers
- Allen Wrenches/multitool
Fitting a Helmet
Instructions
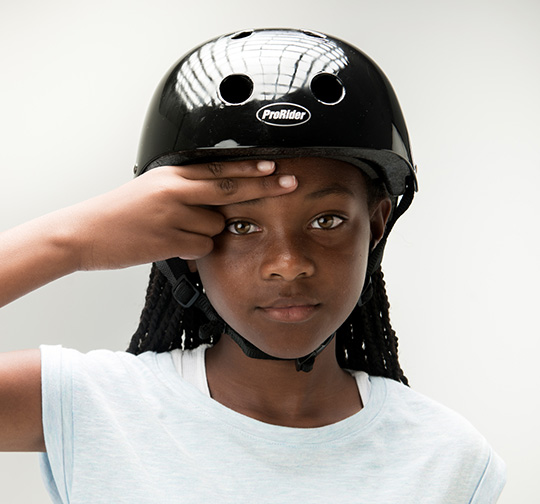
- Fit helmet snugly onto student's head – there should be approximately two fingers distance between the eye brow and the brim of the helmet.
- Side straps should be evenly adjusted to form a “Y” just below the ears.
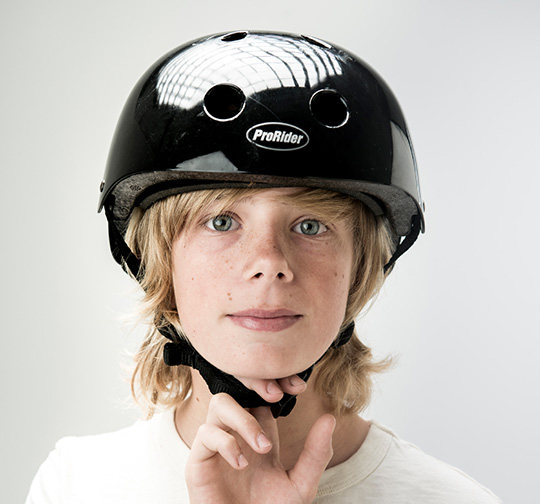
- Tighten the chin strap so no more than one finger can fit between the chin and strap.
- If applicable, adjust dial on back of harness system to bring helmet snug to the head.
An easy way to remember proper helmet fitting is the 2-Y-1 rule: 2 fingers above eye brows, Y below the ears and 1 finger between the chin and strap.
NOTE: Every rider is REQUIRED to wear a properly fitting helmet at all times on a bike. If a larger helmet than what was provided is needed, please reach out to Bike Club directly. Helmets that have been “crashed” must be replaced.
Tip: Helmet will need small adjustments every time it's worn. Don't simply "set it and forget it."
Fitting a Bicycle
Instructions
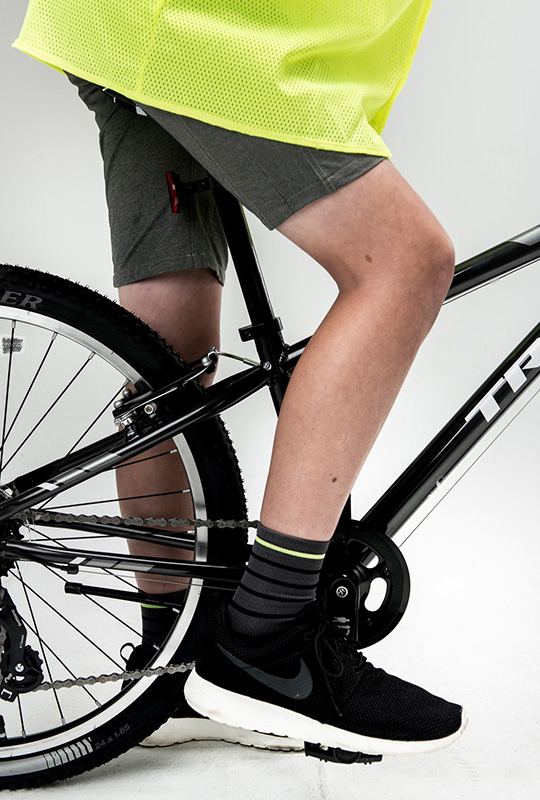
- Using an Allen key or quick release (if applicable) adjust the seat height of the bicycle so that there is only a slight bend to the knee when the rider’s foot is on the pedal in the bottom position. This will maximize power and minimize fatigue.
- Once the proper seat height has been established, have the student sit on the bicycle and place their hands on the grips. While keeping their thumbs under the grips, have them extend their fingers straight out and over the brake levers. Now adjust the brake levers positioning to follow with the general alignment of the riders hand and arm – this will ensure that the rider is able to easily access the bicycles brakes while riding. Most bicycles will not require adjustment to the brake levers.
Tip: Many students will not feel comfortable with the seat at the "proper" height (it will feel too high). For newer riders, set the seat height at the point they can just sit in the saddle with their feet flat on the ground.
What To Wear
Best Practices
- Wearing bright clothes and reflective gear helps to keep you safe. If others see you, they are less likely to run into you. This is why we wear our reflective vest outside of school clothes or jackets.
- Wear clothing that is comfortable while moving and that allows for adequate bend at the knee.
- Be sure that loose shoestrings and/or pant legs don’t get caught in your bike chain or around your pedals. Always ride your bike with shoes – never barefoot or in sandals.
- Don't wear headphones so that you are alert and aware of everything happening around you, such as car horns.
Volunteer Connector Summary
Team Builder — Have students share how someone helped them today. Share these accolades out-loud and reinforce how these attributes help to make a stronger Bike Club team.
Reinforcement — Highlight one student each that is displaying a properly fit helmet, bicycle and appropriate clothing.